samedi 30 juin 2018

Many Thanks


Hello everyone!
Just a quick reminder for our current challenge at the Dream Factory! - This month's movie is


Nine Lives - Voll Verkatert 
Neuf Vies ou Les Neuf Vies de Mr. Fuzzypants

... and we would love to see cats on your creations.


I made this card for my friend Gundi, to thank her for her kindness! Indeed, she did not hesitate to host us for a weekend, despite the very short time between our announcement and our coming! 
I chose these stamps because she like cats and also because she's the one who gave them to me! 
That's it, now you know the whole true story! 😉

Well, let's work!
For this card I stamped one cat and some flowers directly on the circle and the two other cats on separate paper to fussy-cut them. The second circle I punched is a little larger than the first and has a scalloped border. I also embossed a panel with big dots    ...... and all assembled gives what you see.
As always - or almost - I watercolored with felt-tip pens. I added some Washi tape and a paper string between the embossed panel and the circles. The sentiment is stamped on a piece of white cardstock. I glued it with thick double-sided tape, just like the embossed part on the card and the circles on the embossed part.


Inspired? - So, do not wait and put your ideas into action before they fly away! 😉 
.....we look forward to your creations!


Stamps: Cats (Docrafts Papermania); Flowers and Sentiment (Stampin'Up)
Inks: Onyx Black (Versafine); Felt-tip pens
Dies: Circles (Action)
Embossing: Big dots (Stampin'Up)
Washi tape, String,


vendredi 15 juin 2018

Who will eat the cake...?


Hello everyone!
We have a new challenge at the Dream Factory! - This month's movie is

Nine Lives
Voll Verkatert 
Neuf Vies ou Les Neuf Vies de Mr. Fuzzypants

We would love to see cats, cats and cats 😸😸😸


Look at my Birthday cats,


....they are eyeing at the cake!

For this challenge I played with my Katzelkraft cats, - they have not left their box for so long! :((
After stamping the cats - I had to mask a bit to put them that way, I masked them again and stamped the floor (Kaisercraft). I also left a bit of room for the tablecloth. I colored everything with alcohol markers and put a bit gloss on the cats' eyes. For the tablecloth I used a stamp from the set "We must celebrate" by Stampin'Up. 
The cake on the table is hand-drawn and also colored with alcohol markers. - I added a bit Wink of Stella on the chocolate icing and filled the hearts with red pearl pen - to make it more yummy! 
To finish I stamped the sentiment (also from the "We must celebrate" set), and added stitched lines along the edges with my quilter wheel. 


Surely you all have stamps or punches with cats, right ?! So, we look forward to your creations with these mini tigers! 

Happy stamping, cutting, punching....


Stamps: Cats (Katzelkraft); Floor (Kaisercraft); Sentiment (Stampin'Up);
Alcohol markers, Wink of Stella, Pearl pen, Quilter wheel, Glossy, 


lundi 11 juin 2018

Peace to the world


Hello everyone!

Just in time ....

.... that I finished my card for the challenge at Muse Christmas Vision.


Pam's card inspired me with many things! - The colors, the gold, the word, the circle - which I interpreted by a kind of star-shaped stained glass - gold embossed and watercolored with felt-tip pens. I embossed the background after coloring, just with thumb pressure.
... the only thing I did not have was a dove, but I find that the little bird replaces it with lot of dignity!
I also had to come up with something for the letters !!
I embossed a piece of paper with an embossing folder full of letters. - I cut out the letters I needed, sponged them with a bit turquoise ink and stuck them on the panel .....voilà!
I cut the finished panel a little smaller than the white base card and glued a large light blue strip of cardstock between the two.


Linked up with:


Stamps: Scrap Plaisir
Embossing: Stampin'Up
Dies: Unknown - the birdie was a gift
Felt-tip pens, Gold embossing powder

lundi 4 juin 2018

Christmas Wishes


Hello everyone!
Today I made a Christmas card .....we can never have enough of it, right ?!


I started with stamping the row of mistletoe and colored it with felt-tip pens. I stamped the image and colored it with colored pencils and then embossed this panel. I cut out a banner from beige cardstock, glued it on the panel, stamped the part of the image who was hidden by the banner and colored it with colored pencils. I masked the part of the image on the banner and stamped then the gingham pattern and the sentiment. I attached the banner with staples and glued the panel on a turquoise card. At last I added some white pearl pen dots to the mistletoe branches, and a bit of Wink of Stella to the snowflakes and the gifts. 


Linked up with:


Stamps: All stamps are from Stampin'Up. 
Embossing: Stampin'Up
Felt-tip pens, Colored pencils, White pearl pen, Wink of Stella, Staples

vendredi 1 juin 2018

House of Cards - Blog Hop


Ein kleiner Vorgeschmack ... Entdeckt sie in Originalgröße am Ende dieser Seite ;)
Un petit aperçu ..... Découvrez-les en taille réelle en bas de cette page ;)


Schönen guten Tag an alle!
Schon wieder sind sechs Monate vorbei und das bedeutet Blog Hop bei House of Cards!
Bonjour à tous! 
Six mois sont encore passés et cela signifie Blog Hop chez House of Cards!


Der Hop läuft vom 1. Juni 6:00 Uhr bis 15. Juni Mitternacht.
Ce hop se déroulera du 1er Juin 6h00 au 15 Juin minuit. 


Bevor es losgeht möchte ich euch unsere Sponsoren vorstellen, die wie immer, mit tollen Preisen auf euch warten! 
Avant de commencer je voudrais vous présenter nos sponsors qui, comme toujours, vous attendent avec de superbes prix!


Preis: Drei Produkte Ihrer Wahl!
Prix: Trois produits de votre choix!


2 Preise - jeweils 2 Digis 
2 Prix - 2 Digis chaque 


Um einen dieser Preise zu gewinnen versichert euch auf jeden Blog einen Kommentar zu hinterlassen denn die Preise sind versteckt und zufällige Auslosungen werden in den Blogs gemacht, in denen sie sich verstecken! :)
Nachdem ihr alle Blogs kommentiert habt, erstellt eine Karte (siehe Inspiration-Foto) und verknüpft sie mit dem Challenge Blog, für eine weitere Gewinnchance! ;)

Pour gagner un de ces prix, assurez-vous de laisser un commentaire sur chaque blog car les prix sont cachés et des tirages aléatoires sont faits dans les blogs dans lesquels ils se cachent! :)
Après avoir commenté tous les blogs, créez une carte (voir la photo d'inspiration) et liez-la au Blog Challenge pour avoir une autre chance de gagner! ;)


fields of joy | 20 easy pop-out butterflies and flowers | design: jurianne matter | buy online at www.juriannematte...
Inspirations Foto --- Photo d'inspiration


Und hier sind meine Kreationen zum Blog Hop.
Et voici mes créations pour le Blog Hop.


Für die erste Karte habe ich das wunderschöne digitale Stempelset "Open Bloom" von MHK designs verwendet. Was ich an Digi-Stempeln mag, ist, dass man sie auf jede Größe einstellen kann! Hier druckte ich die Blumen in einem sehr kleinen Format, kolorierte sie mit Buntstiften und schnitt sie mit einer Schere aus. Ich habe den Text vergrößert und direkt auf die Karte gedruckt. Dann habe ich ein Stück Wellpappe auf einer Seite abgerissen und auf die linke Seite der Karte geklebt. Ich klebte die Blüten und wicklete noch ein Stück Silberfaden um sie herum. Eine weitere kleine Blume in der Nähe des Textes und ein paar Pearl Pen Punkte und das war's!

Pour la première carte, j'ai utilisé le magnifique set de tampons numériques "Open Bloom" de MHK designs. Ce que j'aime chez digis, c'est que vous pouvez les régler à n'importe quelle taille! Ici, j'ai imprimé les fleurs dans un très petit format, les ai coloriées avec des crayons de couleur et découpées avec des ciseaux. J'ai agrandi le texte et l'ai imprimé directement sur la carte. Puis j'ai déchiré un morceau de carton ondulé d'un côté et je l'ai collé sur le côté gauche de la carte. J'ai collé les fleurs et je les ai entouré d'un morceau de fil d'argent. Une autre petite fleur près du texte et quelques pointes de pearl pen et c'est tout!


Für die zweite Karte wählte ich diesen schönen Digi Stempel von Digistamps4Joy.
 Nachdem ich das Bild mit Buntstiften koloriert hatte, schnitt ich es mit Schere und Skalpell aus. Ich prägte den Hintergrund, wischte ihn mit etwas grauer Tinte und klebte ihn auf eine weisse Karte. Dann habe ich ein Oval aus dem Deckblatt gestanzt und das farbige Bild an diese Stelle geklebt. Der Text (Stampin'Up) ist auf der Innenseite der Karte gestempelt.

Pour la deuxième carte, j'ai choisi ce magnifique tampon digi de Digistamps4Joy. 
Après avoir colorié l'image avec des crayons de couleur, je l'ai découpé avec des ciseaux et un scalpel. J'ai embossé l'arrière-plan, l'ai épongé avec de l'encre grise et l'ai collé sur une carte blanche. Puis j'ai découpé un ovale dans la feuille de couverture et collé l'image colorée à cet endroit. Le texte (Stampin'Up) est estampillé à l'intérieur de la carte.


!!! Habt ihr euren Kommentar hinterlassen? 
Dann drücke ich euch die Daumen und wünsche viel Spaß

.... weiter geht es bei Shawna.
-- die vollständige Hop-Liste findet ihr auf dem Challenge Blog!

!!! Avez-vous laissé votre commentaire?  
Alors je croise les doigts pour vous et vous souhaite beaucoup de plaisir

.... votre prochain étape est le blog de Shawna.
-- vous trouverez la liste complète du Hop sur le Challenge Blog!


Vielen Dank für euren Besuch .... und Viel Glück!!
Merci de votre visite ..... et Bonne Chance!!

Rosi


mercredi 30 mai 2018

Let's Party!


Hello everyone!
Just a quick reminder for our current challenge at the Dream Factory!

Nowhere in Africa - Nirgendwo in Afrika - Nulle part en Afrique
... animals, landscapes, people - everything that has to do with Africa is welcome!


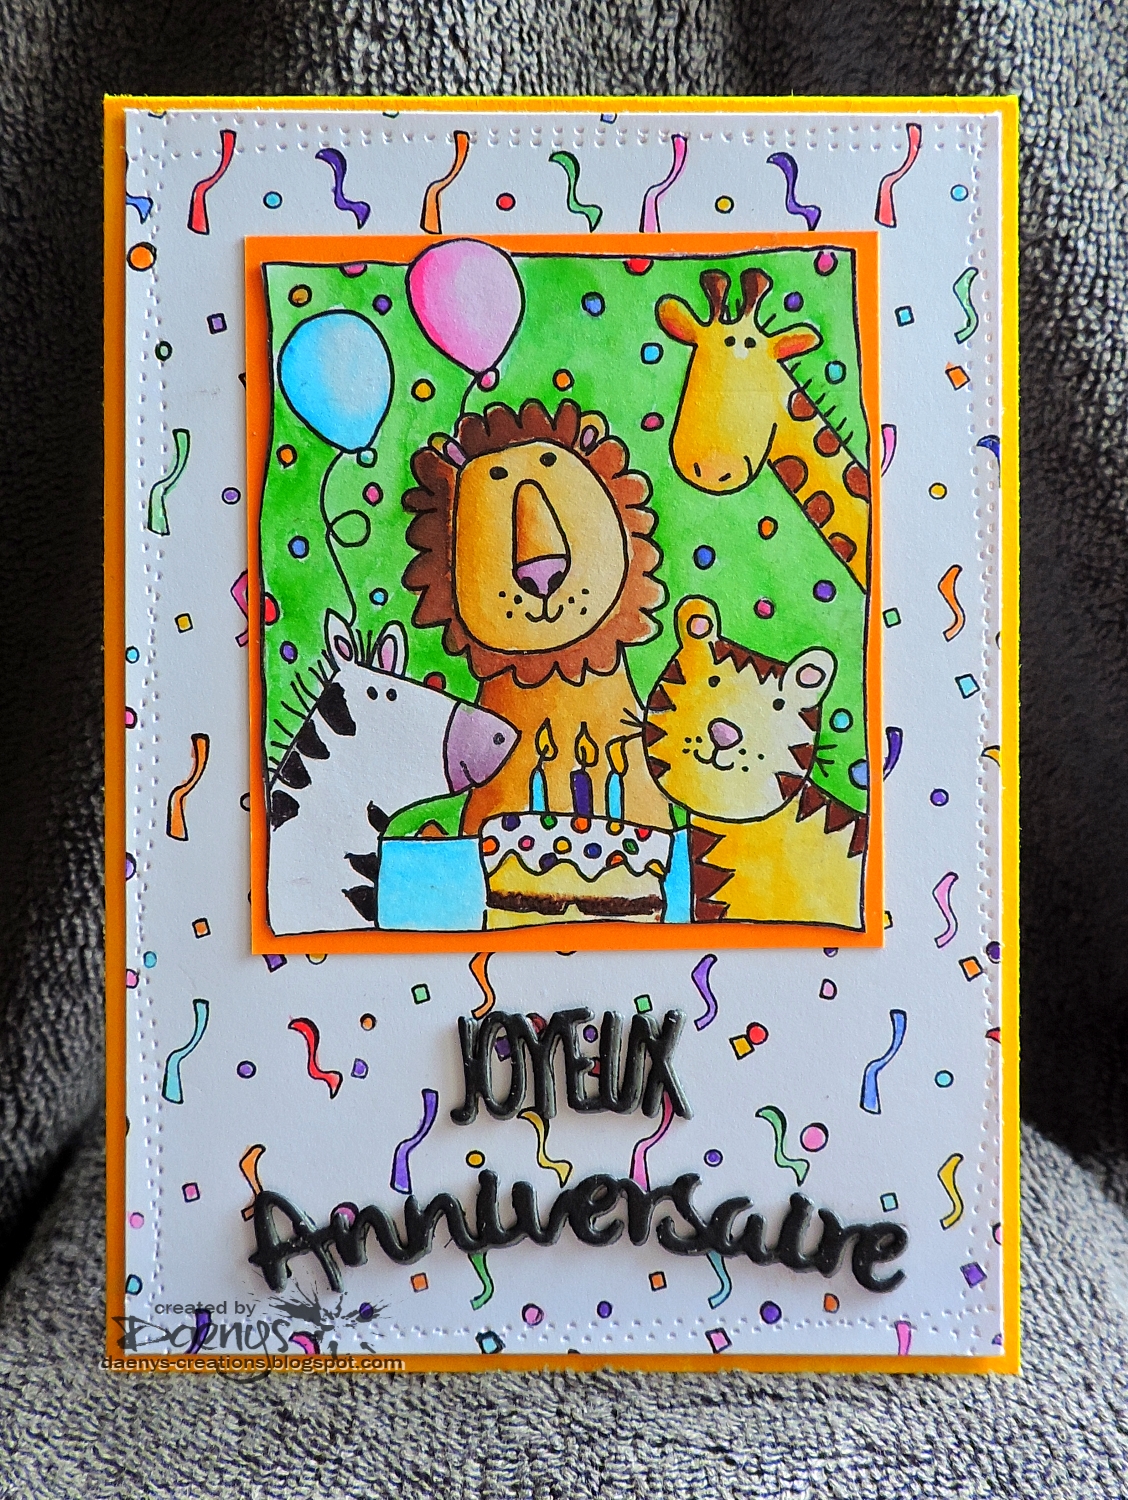
I found this adorable gang on the net, copied it by hand and watercolored it with felt-tip pens. 
The background is made with the confetti stamp from "We must celebrate" (Stampin'Up). I colored with felt-tip pens and added some faux stitching along the edges with my quilter wheel. 
I put the colored picture on orange cardstock and stuck it on the background. 
I cut the sentiment twice in black and once in gray and glued them together, moving the black words slightly over the gray to get a shadow illusion. 
I stuck the background on a yellow card and added the sentiment.


Now it's up to you, 
you still have two weeks to let it roar and growl and bleat, chatter and screech, etc. on your creations! 😀

HAVE FUN!!


lundi 28 mai 2018

Thank you for being here...


Hello everyone!
Some of you have recently joined my blog and others have been there for a while, but I still have not taken the time to write a few lines to welcome you! - That should change today!


I made this little bouquet for you, with flowers from my garden! 
Thank you for your presence and your interest in my hobby!
💗

dimanche 27 mai 2018

Happy Holidays


Hello everyone!
....almost two weeks that I did not show anything!! - What a lazy girl I am!!
Today I wanted to make a Christmas card - you will tell me that we are still far from Christmas, but it is precisely because of that, the more time I have, the more I am late! 😉


Pretty simple this time. 
I watercolored two images with felt-tip pens, fussy cut it and stuck them to the stamped and embossed background. 
The right edge is punched, I wanted to remind on a bit of lace, then underlined with a strip of purple holographic paper. My first idea was to use golden holographic paper, but then I decided to use purple - it sparkles too and gives more pep to the card!
.... a little shade under the gifts and that's it!


Linked up with:
ABC Christmas Challenge - Two letters to choose from: 'J' for Joy and 'K' for Keep it simple --- ('K' for me)
Muse: Christmas Visions - Muse Chriss ---- (I was inspired by the colors and the sparkle)


Stamps: Unknown - I bought them at the flea market
Embossing: Stampin'Up
Punch: Stampin'Up
Felt-tip pens, Holographic paper

mardi 15 mai 2018

See life in pink...

... or just put on pink glasses! ;-)


Hello everyone!
We have a new challenge at the Dream Factory! - This month's movie is

Nowhere in Africa 
Nirgendwo in Afrika 
Nulle part en Afrique

... animals, landscapes, people - everything that has to do with Africa is welcome!


I came up with that on this topic!


I drew the elephant and colored it with alcohol markers. Then I watercolorized - do not know if the word is right - the background and gradually added different fussy-cut and die-cut elements until I liked it!
Voilà, I think it's a fun card!


Thanks for your visit and
Happy crafting!


Linked up with:
Stempelgarten - Tiere
Crafty Friends - Animals
Allsort Challenge Blog - In The Pink
 . Stempelgarten News-Blog Grab our logo


Stamps: Flowers, leaves, sentiment and bird (Stampin'Up); Ice cream (Aladine); Elephant (hand drawn)
Inks: Daffodil Delight, Melon Mambo, Tranquil Tide (Stampin'Up); 
Dies: Stampin'Up
Alcohol markers, Felt-tip pens


lundi 14 mai 2018

Butterfly Wings


Hello everyone!
Can you imagine what you can do with butterfly wings? Me neither - at least not until yesterday!


Twofer's new challenge is about butterflies. 
You can use them as such or think of something completely different.


 I chose the latter and only used the wings!


The first card is a friendship card. 
To make the flowers I used the dies from Scrap Plaisir, you can see the set below. 
I colored the background with light blue watercolor. After drying I stamped stems, leaves (Scrap Plaisir) and sentiment (Stampin'Up). I colored the leaves with green Felt-tip pen and water.
Then I die cut a couple of butterfly wings for the flowers and colored them with pink Felt-tip pen and water. I pasted them on white paper, fussy cut it and glued it to the stems.
Finally I added three pearl pen dots near the sentiment and a faux stitching at the edges.


This card was in my head before I made the one with the flowers - hence the choice of butterfly wings - the only ones who allowed me to make a Christmas tree! 
I die cut the pair of wings twice from gold holographic adhesive paper and assembled them into a Christmas tree.
I stamped the Christmas word cloud in turquoise blue on a piece of white paper and stuck it, as well as the Christmas tree on the embossed sheet. To finish, I glued the panel on a turquoise card.


This is the set of butterfly wings of whitch I used the couple that you see on the closer view.


Have a Happy Day!


Linked up with:
Twofer Card Challenge - Butterflies
Christmas Card Throwdown - Turquoise and Gold (Second Card)
Time Out Challenges - Inspired by Words (First Card - Friend / Blossom for me)


First card:
Stamps: Stems and leaves (Scrap Plaisir); Sentiment (Stampin'Up); 
Dies: Butterflies (Scrap Plaisir)
Felt-tip pens and pearl pen

Second card:
Stamps: Word cloud  (Scrap Plaisir)
Dies: Butterflies (Scrap Plaisir)
Embossing: Stampin'Up
Gold holographic adhesive paper

dimanche 6 mai 2018

Monochrome....

... that was the challenge our Stampin'Up demonstrator gave us for the last swapp!

Hello everyone!
The title lets you guess what it's all about today!
The swapp took place in April but I have not published the pictures yet and when I saw the new challenge at Steckenpferdchen, I thought, ok, that fits!


....here they are!


... I made 15 pieces of it !! - The hardest part was punching and gluing all the tiny letters for the "Hello".....
But now from the beginning:
I started embossing the background with à linen cloth, then I stencilled with textured paste to make the pattern.
Next I die-cut the flowers, added Wink of Stella to the petals and stuck it to the card using foam pads. I also added a piece of gauze to each flower. I tore parchment paper into small strips and attached them with organza ribbon to the card. Then came the difficult part - gluing all the tiny die-cut letters! 😓....But also that had an end and I was really happy with the result! 
At the very end I put three small pearl pen dots in the upper right corner ....just for relaxing :))


Wink of Stella is so hard to photograph - here you can guess a hint of its sparkle!


Happy Sunday!


.....I found some more challenges for monochrome :))
Steckenpferdechen - Ganz in Weiss
Monochrome Magic - Monochrome
Ike's World - Monochrome
Unicorn - Monochrome

 Grab The Blog Badge! . Grab Our Badge!


Dies: Flower (Scrap Plaisir); Letters (Joy Crafts)
Stencil (Stampin'Up)
Wink of Stella, Pearl Pen, Parchement Paper, Organza Ribbon, Gauze


samedi 5 mai 2018

For Mom 💝


Hello everyone!
On May 13. is Mother's Day. - My card is ready to go ....yours too?!


Cute - isn't it!

I got the little hedgehog from my friend Gundi last year - a long time, I know - but today it was the right time to use it!
I heat embossed the sentiment in white on black cardstock and trimmed it into two pieces. - I wanted to have that, even without knowing how the card would look in the end! 
Then it was Hedgie's turn! I colored it with watercolor and cut it into a circle. I also cut off the lower part because I did not like the empty space. I layered with black cardstock and put it aside.
To create the background, I stamped tiny bubbles, flowers and leaves and added some watercolor. I stuck design paper to the bottom and trimmed the sheet with a wavy die cut. 
I glued the background first on mint green paper, then to the card. 
It remained to add Hedgie and the embossed words.  
.....and finally I completed with two little hearts on each side of the sentiment.

At first I was a little skeptical about the background but finally I like it. 


Have a nice weekend


Linked up with: 
Addicted To Stamps and More - Photo Inspiration (I was inspired by the flowers and the frames)
Happy Little Stampers - Watercolor 
Basteltraum - Muttertag / Blumen 


Stamps: Hedgehog (Whipper Snapper); Blooms, Leaves, Bubbles and Hearts (Stampin'Up); Sentiment (Mia's Stempelküche)
Inks: Pear Pizzazz, Melon Mambo, Daffodil Delight (Stampin'Up); Onyx Black (Versafine);
Dies: Action
... and Watercolors

mardi 1 mai 2018

Do you want popsicles?


Hello everyone!
We have a new challenge at House of Cards and this time we would like one shaped card! (see the inspiration photo below)


As you know you can only use the colors - or like me, combine both!


To color (with alcohol markers) more cleanly the different parts of the ice lolly, I cut it into three pieces. I stuck the colored  pieces on a piece of paper of the same size and embossed it to get the big furrows you see. - To emboss I had to trick and find something to make the furrows - by chance, I kept a plastic packaging that allowed me to do it!  👍👍
The stick is made from the inside of a packaging. I stamped the sentiments (Stampin'Up) and glued the popsicle on a card of the same shape. Finally I cut the "bitten corner" with a scallop shaped die.
Gönn dir was! - means something like - Treat yourself!


...and here is the inspiration photo
Shaped card and/or Colors


Looking forward to see your creations! Happy crafting!


lundi 30 avril 2018

A big carrot...


Hello everyone!
Do you remind our current challenge at the Dream Factory?

Peter Rabbit - Peter Hase - Pierre Lapin


Poor bunny, how desperately he pulls on his carrot!
I found this cute guy on Pinterest, copied it by hand and colored it with colored pencils and felt-tip pens. 
-- The original drawing: "Strong" by Monica Carnesi --
The sentiment is a mix from different Jillibean Soup stamps (with a handwritten "carrot") 😊


Inspired?? - you still have two weeks to join us!! It would be great to see your creations!
Happy crafting!


dimanche 29 avril 2018

Take a ride ....

....why not skate?

Hello everyone!


I made this card for my grandson's birthday and I really had fun doing it! 
At first I imagined a kind of ramp, that finally turned into a wall --- seen from the side! - But it allowed me to put the skater "behind" the wall!
Before embossing "the wall", I stamped it with splashes, arrows, the big B-DAY and the little Happy. After embossing I stamped scratches and sponged here and there with gray and beige ink to get a dirtier look.
The skater is colored with alcohol markers and then fussy cut. I colored the background with light blue watercolor and stenciled the sun rays with yellow and orange ink. I put all together and glued it first on black cardstock and then on a white card. The skater sticks on foam pads.

Thanks for reading and hope you like this little scene!


Linked up with:
Little Red Wagoon - Riding Along!
Stempelküche - Für Männer / Jungs


Stamps: Skater, Splash, Arrows, Scratches (Scrap Plaisir); B-DAY (Aladin); Happy (Stampin'Up)
Inks: Majestic Blue, Onyx Black (Versafine); Pumkin Pie, Daffodil Delight, Real Red, Shara Sand, Smoky Slate (Stampin'Up)
Embossing: Stampin'Up
Stencil: 13@rts

mardi 24 avril 2018

Cool Cats


Hello everyone!
.... in last minute - that I managed this card duo! Why a duo? Well, I just discovered Twofer Challenge, a card challenge blog of a new genre, that I really wanted to join in! - A completely new concept, because there must be two cards!
....but what am I talking about, look at it yourself and maybe you will like the concept too!


The requirement is pets. - I love cats, so I chose these cute velvet paws from Clearly Besotted Stamps.


The first card can be used for different occasions. 
It is was quite simple to design - although the small fish were not easy to cut!
I watercolored with felt-tip pens.


For the second card, it was another song! Stamping, masking, coloring, cutting ... in short, I spent a good part of my afternoon for this card and I am totally satisfied and in love with her !!
...Self-praise stinks but this time I like to accept it! hahaha
The cats, the gifts and the background are colored with alcohol markers. I first colored the Christmas tree with colored pencils, then with felt-tip pens and then I set accents with alcohol markers. The floor is stamped (Kaisercraft) and sponged with Sahara Sand (Stampin'Up). Unfortunately, I can not tell you from which manufacturer are the sentiments - I bought them at the flea market!


Have a Happy Day!


Stamps: Floor (Kaisercraft); Cats (Clearly Besotted Stamps); Christmas tree and gifts (Scrap Plaisir); Hot air balloon (Jillibean Soup); Sentiments (Unknown)
Inks: Onyx Black (Versafine)
Felt-tip pens, Alcohol Markers, Colored Pencils

vendredi 20 avril 2018

A Magical Day


Hello everyone!
Many many birthdays in the next few weeks - and there are also two challenges I want to join!
But to tell you the whole truth ....


... I just received my latest Stampin'Up stamps and I could not resist using them!


I also bought the corresponding dies with these stamps - this is much more practical - cutting with dies is much faster and cleaner than cutting with scissors!
I watercolored the background and then die cut small stars at top and bottom. 
While the paper was drying, I stamped and punched one unicorn and colored it with the same colors as those used for the background. I stamped two other unicorns and a few stars directly on the colored sheet and stuck glitter paper under the die cut stars. 
I trimmed the sheet with a wavy edge cutting die, added the sentiment, stuck the colored unicorn by using foam pads and pasted the sheet on a white base card.


Hope you have a magical day too!


Linked up with:
Challenge Up Your Life - Unicorns and/or Rainbows
Stempelküche - Fabelwesen


Stamps: Stampin'Up
Inks: Onyx Black (Versafine); Felt-tip pens
Dies: Stampin'Up


mardi 17 avril 2018

Let's be lazy 😉


Hello everyone!
Today we had really nice and sunny weather - it really smelled like summer!


... and it turns out, that I have something that goes perfectly with it!


I made this card already two weeks ago and for today, .....it fits like a glove!
The image (digi stamp) is colored with alcohol markers. I stamped,colored and cut out the sun and added it as well as the sentiment to my card. Voilà! 


Hope you have a lot of sunshine too!
See you soon :)


Stamps: Sun and Sentiment (Lora Bylora), the image is a digi
Inks: Onyx Black (Versafine), Alcohol Markers